Search
Save $10 when you sign up for our Karat Rewards Program

Shop
Shop by Categories ![]()
Cleaning Out Jewelry Box: Tips for Sparkling Treasures
October 15th, 2019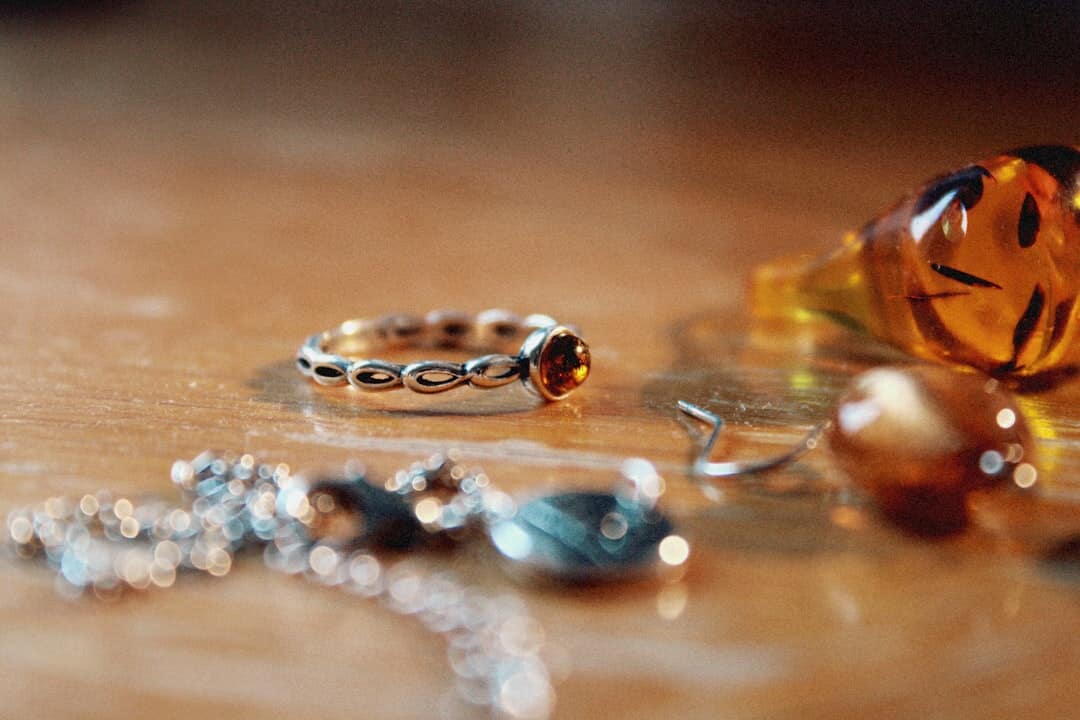
If you are currently researching cleaning jewelry box methods, chances are your pieces are tangled, dusty, and hiding in clutter. You probably have some favorites you wear all the time, a few sentimental heirlooms, and a whole lot of confusion in between. Cleaning jewelry box chaos is less about scrubbing and more about taking control of what you own.
A disorganized box makes it difficult to see what you actually possess. You end up wearing the same three items because you cannot reach the rest. This guide walks you through how to clear the clutter and safely clean what you love. You will learn how to decide what to sell or repair. By the end, you can turn that messy box into a collection you feel proud of again.
Why Your Jewelry Box Needs A Regular Clean Out

Most people only think about cleaning a ring or necklace, not the whole storage situation. But an overstuffed box can actually damage your jewelry and cost you money in the long run. Tarnish spreads from one piece to another if they are touching.
Dust and fabric fibers act like sandpaper. They scratch softer stones and polish off delicate metal finishes. Here is what tends to happen over time inside a neglected box.
- Chains tangle and kink, which can lead to breakage.
- Dust and fabric fibers scratch softer stones and metal.
- Pieces you never wear sit there while their resale value drops.
- Heirlooms get buried so deep you forget where they are.
- Moisture trapped in dust pockets accelerates oxidation on silver.
On the other side, a fresh clean out often turns up lost favorites. You might find a missing earring that completes a pair. You might even find pieces that are perfect to sell or trade for something that actually fits your style now. Think of this as a mini home reset, just focused on one little box that quietly holds a lot of your story.
Step 1: Empty Everything Out Of The Box
Put your jewelry box on a clear, flat surface with good light. A kitchen table works well, or even a bright desk. Lay down a clean white towel or a velvet mat.
The towel prevents tiny studs and earring backs from bouncing onto the floor. It also helps you see dirt and debris clearly. Now take every single piece out of the box.
Do not skip the tangled clumps or the random charm that rolled into the corner. Empty every drawer and compartment. Spread everything out where you can see it.
You might feel a little overwhelmed by the pile in front of you. That is normal. It is exactly why cleaning jewelry box clutter once or twice a year is such a good habit.
You cannot organize what you do not see. You also cannot sell or repair what you have forgotten you own. Seeing the full volume of your collection is the first step to making smart decisions.
Step 2: Sort Into Simple Piles That Make Sense
Now you are going to give every piece a "home team." This is where you start making decisions. Use four easy piles so you do not get stuck in indecision.
Keep And Wear Regularly
This pile is for what you reach for every week or at least every month. Include your daily ring and your go-to studs. Add the chain you layer with everything.
If you would be annoyed not to see it in your box, it goes here. These items deserve the most accessible spots in your box. They are the core of your current style.
Sentimental Or Heirloom
Some pieces have emotional value, even if you do not wear them often. This includes your grandmother's locket or a ring from a special event. A piece you hope to pass down one day belongs here too.
These stay, but they need their own safe and separate area. You do not need to look at them every morning while getting dressed. They can be stored in the back of the box or in a separate pouch.
Repair Or Repurpose
Here is where honesty helps. Check every clasp, prong, and chain under a bright light. Look for missing stones, bent posts, or kinks that catch on fabric.
Anything damaged goes in the repair pile. You can bring these to a jeweler and talk about repairs or redesigns. If there is a stone or setting you love in a style you never wear, ask about turning it into a fresh piece that fits your current taste.
Sell, Pawn, Or Let Go

Now for the "be real with yourself" pile. These are the items that you never reach for, do not love, or have simply grown past. Maybe the style feels dated.
Perhaps you received it as a gift and just never connected with it. This is the pile that can free up space and possibly put cash in your hand. Set these items aside as your list for a local buyer, pawn shop, or consignment option.
We will walk through how to handle that in a minute. Do not let guilt force you to keep things you dislike. Your jewelry box should only contain things that bring you joy.
Step 3: Clean The Jewelry Box Itself
Before anything goes back in, the box needs attention. A dusty, grimy box can undo all the work you are about to put into polishing your pieces. Dirt in the lining acts as an abrasive against polished gold.
For Velvet Or Fabric Lined Boxes
Many nicer boxes are lined with velvet or another soft fabric. Those plush surfaces collect dust, lint, and oils from lotions and perfume. That grime then transfers back to your jewelry over time.
A simple, gentle clean up is usually enough. You do not want to soak the fabric. That could warp the glue holding the lining in place.
- Use a clean, soft makeup brush to lift dust from the fabric corners.
- Run a lint roller or tape over larger flat areas to catch tiny fibers.
- For stuck grime, a barely damp cloth can help.
- Let the box air dry completely before adding jewelry back.
Many luxury and estate jewelry stores talk about how proper velvet storage cuts down on scratching. You can see an example of care tips in an article on how to clean and organize a velvet jewelry box, shared by a fine estate jeweler through their social share tools at AddToAny. The core message there lines up with what you are doing here.
Gentle care and regular attention extend the life of your pieces. If the box smells musty, place a small dish of baking soda inside and close the lid for a day. This absorbs odors without using chemicals.
For Wood, Leather, Or Hard Cases
Hard cases are easier to manage. Dust out the interior with a soft cloth. Wipe the outside with a slightly damp cloth if needed and dry right away.
For wood exteriors, a small amount of wood cleaner on a cloth works well. For leather, use a specific leather conditioner if the material looks dry. Skip harsh all-purpose cleaners or anything scratchy.
Chemicals can mark up the finish. You do not want tiny abrasive bits left where your metal will sit. The box does not need to shine like new, it just needs to be clean, dry, and free of anything that can harm metal or stones.
Step 4: How To Safely Clean Your Jewelry At Home
Now we are moving from storage to the pieces themselves. Most daily jewelry builds up a film of oils, soap, and dust. A simple cleaning makes stones brighter and metal less dull.
It is important to know which materials can handle water and which cannot. A diamond is tough, but a pearl is fragile. Treat each piece according to its needs.
The Gentle Cleaning Method For Most Pieces

For many rings, bracelets, and necklaces made of gold or platinum, a gentle soap bath works well. This is also safe for hard stones like diamonds, sapphires, and rubies. Do not use moisturizing soaps, as they leave a greasy film.
- Fill a small bowl with warm water and a drop of mild dish soap.
- Place the jewelry in the bowl and let it soak for a few minutes.
- Use a soft toothbrush to clean behind stones and around clasps.
- Rinse under lukewarm water, using a strainer so nothing goes down the drain.
- Pat dry with a lint-free cloth and let air dry fully.
Always be gentle with pressure. If a stone wiggles or a prong seems loose, stop brushing immediately. Move that piece to the repair pile.
Cleaning too hard on weak settings can cause a stone to pop out. It is better to have a dirty ring than a broken one. Let a professional handle the delicate settings.
Quick Silver Cleaning Trick
Silver loves to tarnish when exposed to air. Sometimes it darkens to the point where you forget how nice it can look. You can do a mild polish at home.
Make a thick paste from baking soda and a little water. Use about one part water to three parts baking soda. Dab the paste onto the silver with a soft cloth or sponge.
Rub gently, then rinse and dry thoroughly. This helps lift light tarnish without harsh chemicals. For heavy tarnish or antique silver pieces, it is better to have a professional clean them.
Intricate engraving can be damaged by aggressive rubbing. Vintage focused jewelers often share before and after shots on platforms like Facebook or Twitter, and the shine they bring back is a good reminder that professional care has real value. If you see a deep black layer that does not budge easily, seek help.
Pieces You Should Not Clean Yourself
Some materials do not love water, soap, or scrubbing at all. These include porous stones like opal, turquoise, and emeralds. Pearl strands also require special care because water weakens the silk thread.
Glued-in stones (often found in costume jewelry) will fall out if soaked. With these items, less is more. Stick to dry methods to be safe.
- Wipe gently with a dry, soft cloth to remove surface oils.
- Avoid soaking, chemicals, and ultrasonic cleaners completely.
- If they look very dirty, plan to take them to a jeweler.
High end stores that sell fine jewelry often invite clients to book an appointment for cleaning and checkups. If you own luxury or designer pieces, follow that same mindset. A quick visit for cleaning and an inspection can save a costly repair later.
Summary of Cleaning Methods
To make it easier to remember, here is a quick reference guide.
| Material | Water Safe? | Method |
|---|---|---|
| Diamond/Gold | Yes | Warm water & mild soap |
| Silver | Yes | Polishing cloth or baking soda paste |
| Pearls | No | Wipe with damp cloth only |
| Opals | No | Dry soft cloth only |
| Costume | No | Dry dust only |
Step 5: Make A Repair Plan Instead Of A Repair Pile That Sits
At this point, you should have a clear group of items that need help. Broken clasps, thin shanks, loose stones, bent earring posts. Do not let them sit for another two years in a bag.
Make a simple table like this to stay organized. It helps you prioritize where to spend your money. Not everything needs to be fixed at once.
| Item | Issue | Priority | Notes |
|---|---|---|---|
| Diamond ring | Loose prong | High | Wear weekly, fix soon |
| Gold chain | Broken clasp | Medium | Ask about new clasp style |
| Vintage brooch | Missing stone | Low | Check cost before deciding |
Then look for a trusted local jeweler. Some boutiques share their services under sections like Custom Designs or cleaning and care programs, which can include repair. That is the type of shop that is used to talking through budgets and priorities.
If a repair will cost more than the piece is worth, think about your options. You might choose to scrap it for the gold value. Do not feel guilty about letting it go.
Your money is better used on pieces you love and wear. The goal is a working, wearable collection. You do not want a drawer full of expensive "to-do" items.
Step 6: Decide What To Sell, Pawn, Or Gift
Now to that "let go" pile you set aside earlier. Those pieces are potential cash, trade credit, or generous gifts. What you do here depends on your goals.
Questions To Ask Before You Sell
Pick up each piece and ask yourself a few things. Be honest about your attachment. The answers will guide your next step.
- Do I like this, or am I holding it out of guilt?
- When was the last time I wore it?
- Would I rather have the cash or this item?
- Could someone I know love this more than I do?
If you lean to cash, start building a list with descriptions. Note any stamps, marks, and take clear photos. You can take that list to a local buyer, jewelry store, or pawn option in your area.
Some buyers operate out of retail locations. Others operate from private offices like those found in busy downtown spots at addresses such as 1000 Brickell Ave Suite 100 Miami, FL 33131. These private offices often offer a more discreet selling experience.
Call ahead and ask about what they buy. Ask if they offer written offers or appraisals. Do not feel rushed into any decision, especially for pieces with gold, diamonds, or brand names.
Getting more than one opinion is fine and often smart. Compare the offers you receive. Make sure you feel comfortable with the buyer.
Trade And Rewards Options
Some modern jewelers offer trade-in or rewards programs. They may let you trade an old piece for credit on something new. This is a great way to upgrade your style without spending new money.
Others have loyalty perks, similar to the style of programs shown on pages like Rewards. Look around before you decide where to take your items. You may find that a trade upgrade gets you closer to that one dream piece than just a straight sale.
If the financial value is low but the piece is nice, consider gifting it. A vintage piece might thrill a younger cousin or friend. Passing it on extends the life of the jewelry.
Step 7: Put Everything Back With Intention
Now your jewelry is cleaned, your box is refreshed, and you have a sense of what stays. It is time to put everything back, but with more structure than before. Do not just dump it all in.
Set Up Zones Inside Your Jewelry Box
Try grouping like with like so you do not end up in the same tangle next year. This makes finding things in the morning much faster. It also prevents harder stones from scratching softer gold.
- Daily wear zone: Keep rings, studs, and chains you use all the time here.
- Special occasion zone: Store dressier earrings or statement pieces in the drawers.
- Sentimental and heirloom area: Keep this separate and clearly defined, perhaps in the bottom layer.
- Current repair or project section: Keep this visible so you act on it.
If your box does not have enough small sections, add simple ring trays. You can use tiny bowls or soft pouches to separate items. They stop chains from sliding around and knotting.
You do not need a custom safe or expensive inserts. Just create a system that fits what you own today. Small plastic bags can also prevent silver from tarnishing by blocking air.
Think Beyond The Box For Some Pieces
Very delicate or high value items may do better stored elsewhere. You can keep them in a small home safe or safety deposit box. Use the jewelry box as your everyday space, and move long-term items out.
For travel, do not throw pieces loose in a makeup bag. That is the easiest way to lose an earring or break a chain. Use a small travel case or soft wrap that separates each item.
Many jewelry brands sell these travel solutions. They might mention them in their event and care sections, similar to the ones shared through pages about client Events and private services. Investing in a travel case protects your investments while on the road.
Step 8: Create A Simple Jewelry Inventory
This last step seems like extra work, but it pays off if something is lost or stolen. Plus it gives you a real sense of what you own. You will stop buying repeats of the same thing once you know what you have.
Use your phone for this task. You do not need fancy software or a complicated spreadsheet. A simple photo album on your phone works wonders.
- Lay out each item and take a clear photo.
- Write a short description, including metal, stone, and any hallmarks.
- Note where you bought it or who gifted it to you.
- Save this in a simple folder or document that you can back up.
If you share your collection online for inspiration boards, platforms like Pinterest can help you think through styles you already own. You can create private boards to visualize new outfits. Just be mindful about privacy and do not reveal prices or where items are stored.
This inventory is mostly for your records. It is vital for any future insurance claims or sale needs. Update it whenever you buy or sell a piece.
How Often Should You Be Cleaning Jewelry Box Clutter
A full deep clean like this does not need to happen every month. That would be too much work for most people. But waiting five or ten years is a recipe for more damage and frustration.
A realistic rhythm is once a year for a big reset. Add in quick mini checks every few months to stay on top of it. This prevents the mess from becoming overwhelming again.
Here is a simple schedule idea.
- Once a year: Do a full empty, clean, sort, and inventory update.
- Every three to four months: Wipe dust, untangle anything new, and move never-worn items to the sell pile.
- Immediately: Any time a piece feels loose or looks off, move it right to the repair group.
If you are busy or travel often, pick a season that makes sense, like early spring. Put a reminder in your calendar. You can set it the same way a business might set operating hours such as 9:00 to 15:00 CEST.
Treat it like a small annual appointment with yourself. You are protecting things that matter, both emotionally and financially. It is a small time investment for a big reward.
Frequently Asked Questions
Can I use toothpaste to clean my jewelry?
No, you should avoid toothpaste. It is abrasive and can scratch gold and soft stones. Stick to mild dish soap and water.
How do I stop necklaces from tangling in the box?
Store them hanging up if possible. If they must lay flat, thread the chain through a straw before clasping it. Small individual zip-lock bags also work well to keep them separate.
Is it okay to store all my jewelry in the bathroom?
The bathroom is actually the worst place for jewelry. The humidity and heat accelerate tarnish on silver. It helps to keep your box in a bedroom or closet where the temperature is stable.
Conclusion
Cleaning jewelry box chaos is not about chasing perfection, it is about being intentional. You clear out the pieces that no longer fit your life. You bring back the shine to the ones you love and store them in a way that protects rather than harms.
Along the way you create room, literally and mentally, for jewelry that actually feels like you today. The next time you open your box after a proper clean out, you will not see a knot of chains and mystery studs. You will see a curated group of stories, memories, and daily staples ready to wear.
The habit of regularly cleaning jewelry box clutter will keep it that way. You will experience less stress and less waste. Instead, you will find more joy every time you pick out what to wear.
Related Articles
- How to Sell Collectibles Online for Maximum Profit
- How to Sell an Apple Watch: Quick Tips for Top Dollar
- How to Sell AirPods for Cash Quickly and Easily
- Maximize Profits: Expert Guide to Selling a Gold Watch
- Maximize Your Profits: Expert Guide to Selling A Gold Chain

- Sign In
- Register
Sign In to Pawn America
Password Reset
Enter your email address and we’ll send you a link to reset your password.